📌 Important: All families must create a new school account before enrolling in any courses.
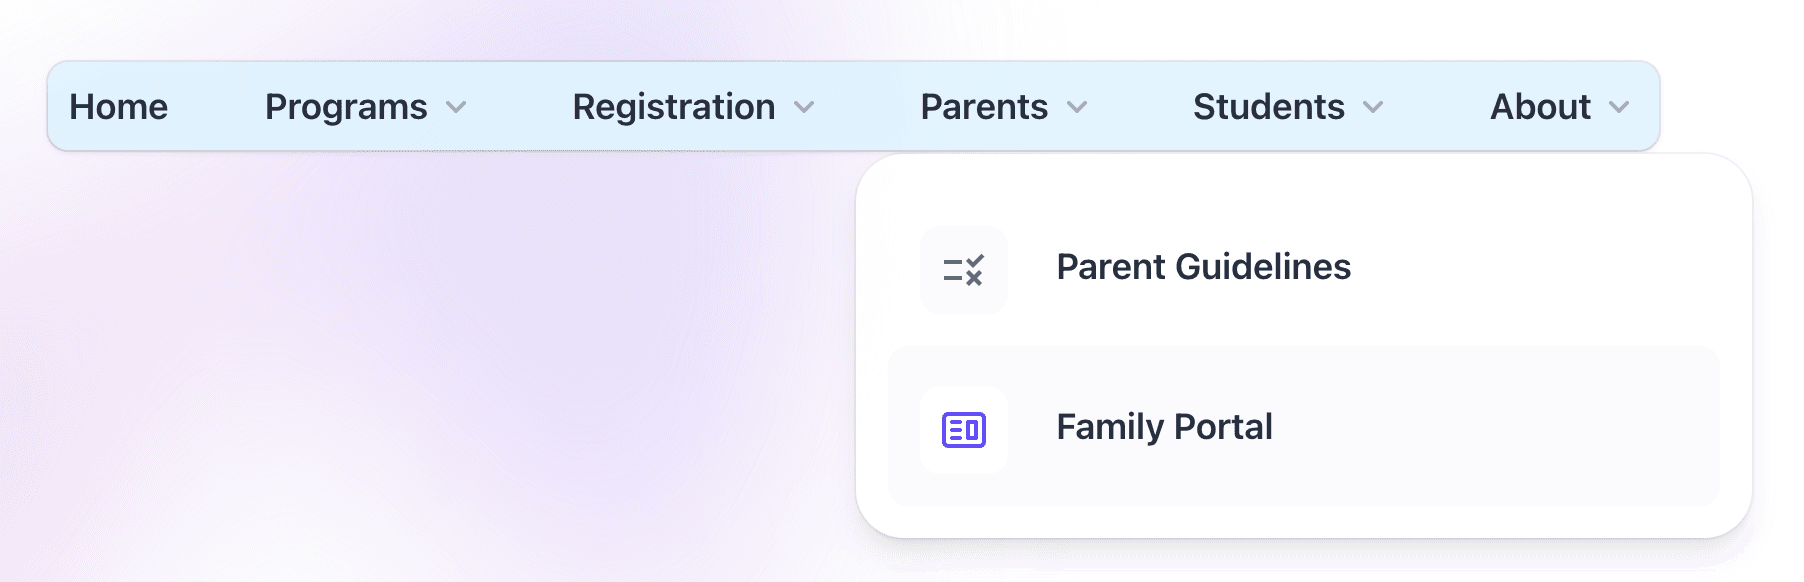
1. Access the Family Portal
Go to the "Parents" section and click "Family Portal."
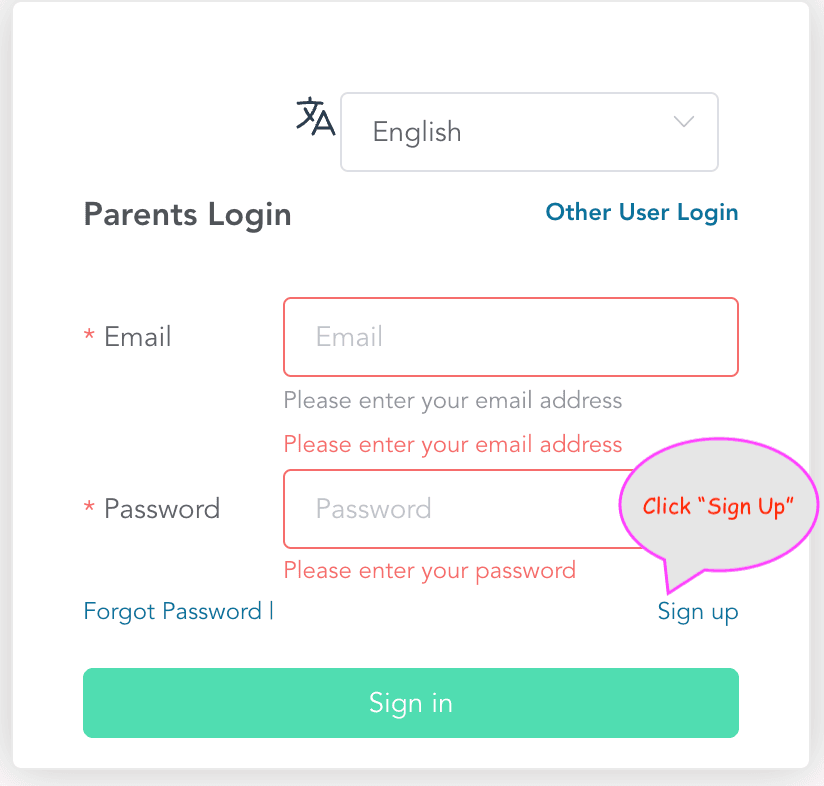
2. Sign Up for an Account
On the pop-up dialog, click "Sign Up" if you don’t already have a family account.
3. Enter Family Information
Fill out all required fields using parent or guardian information (not the student’s).
4. Confirm Registration
After submitting, you’ll see a confirmation message: “Registration was successful”, followed by a "Sign In" screen.
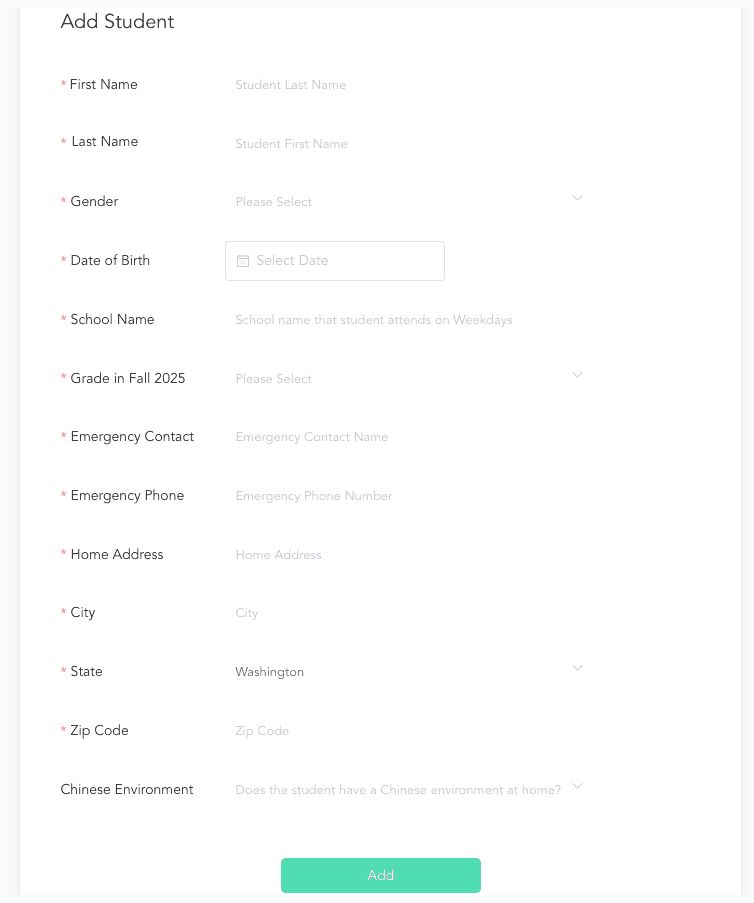
5. Sign In and Add First Student
Click the large green "Sign In" button. You will then be prompted to add your first student.
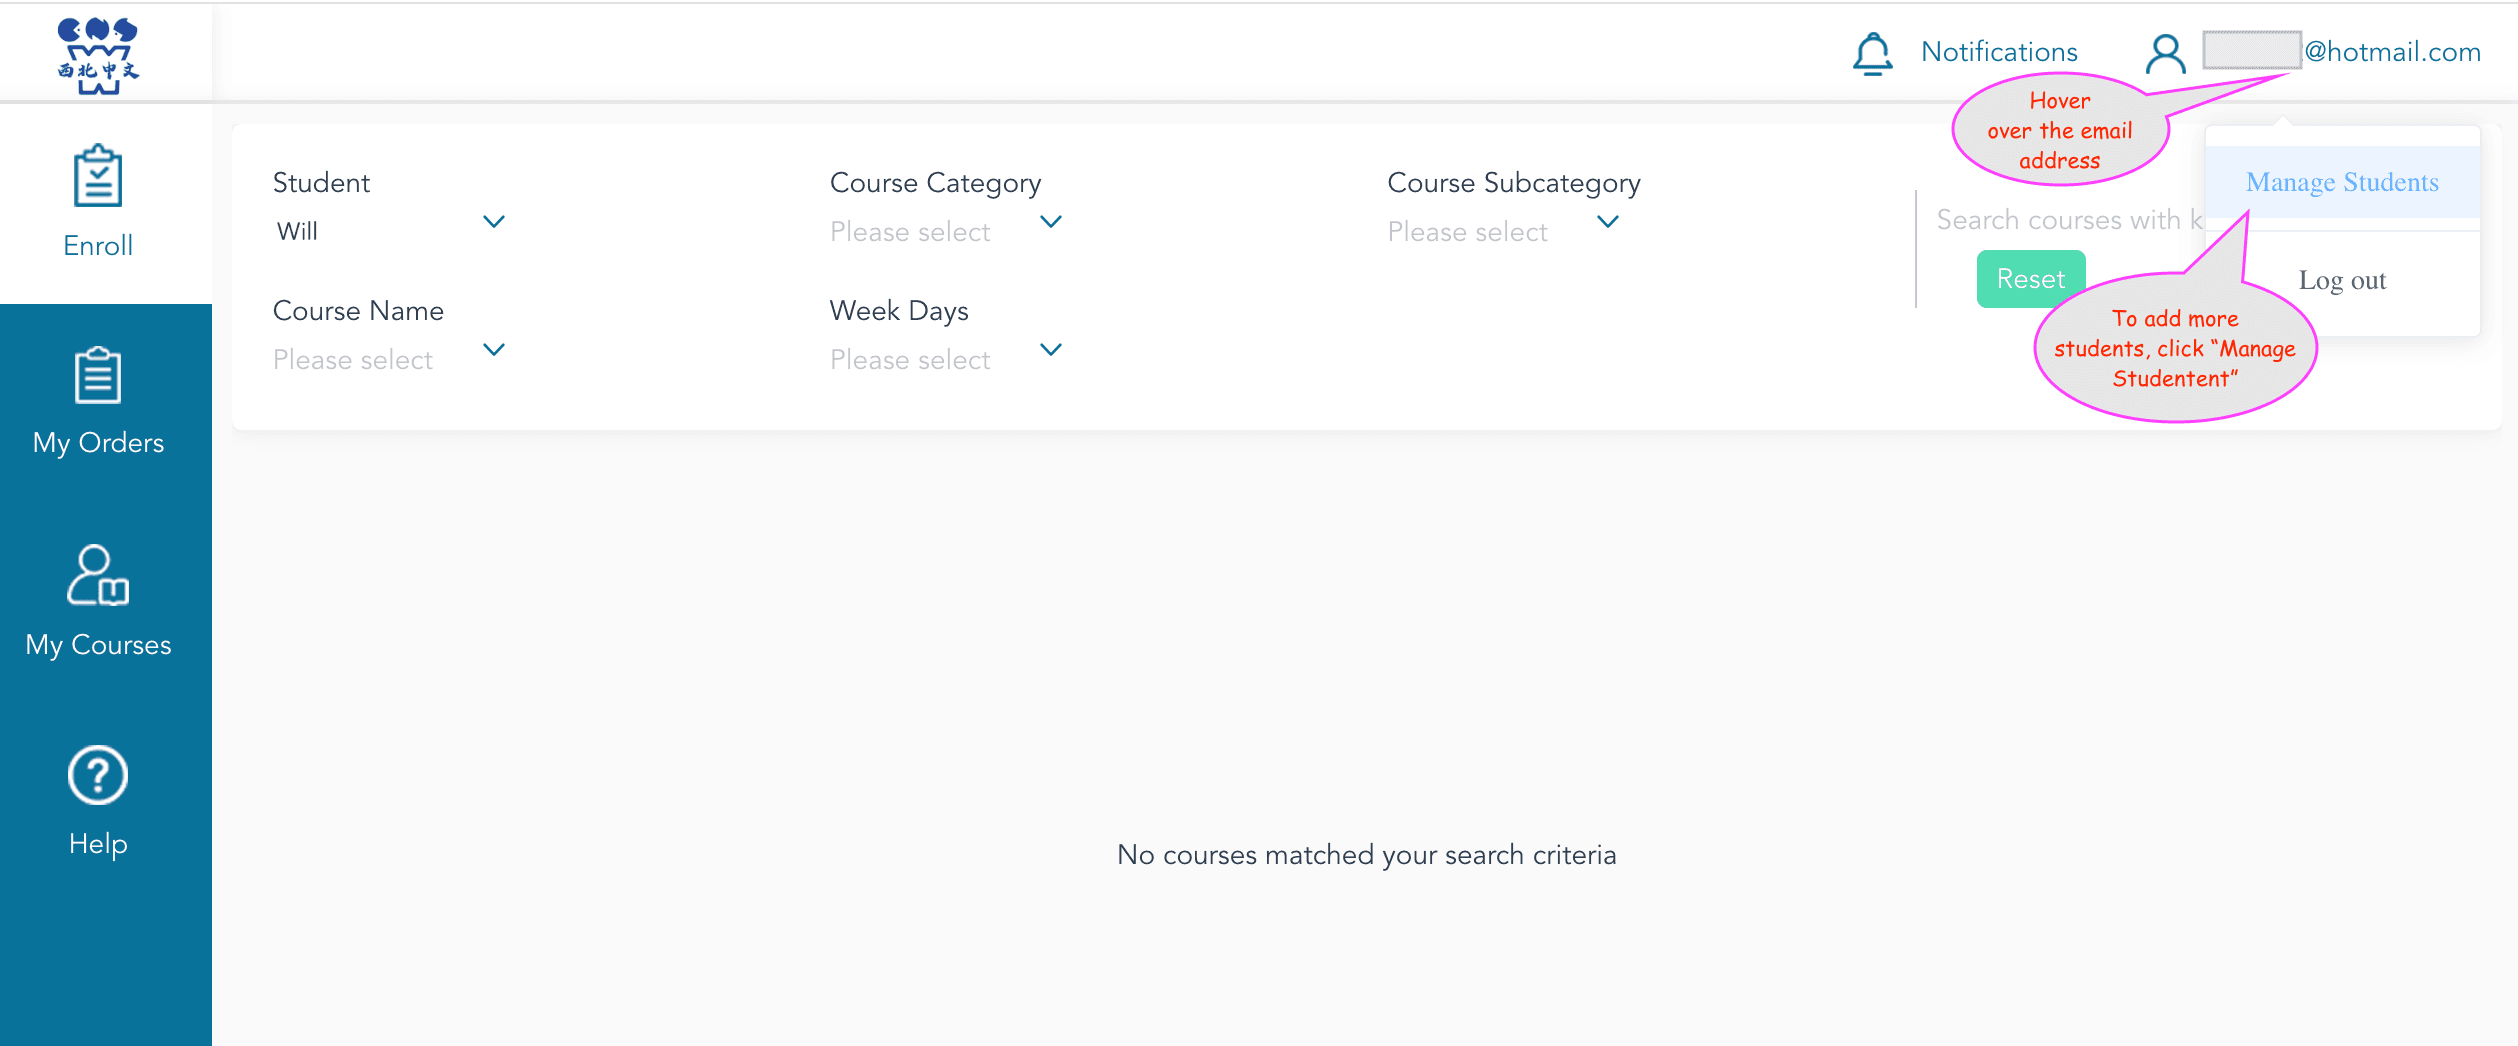
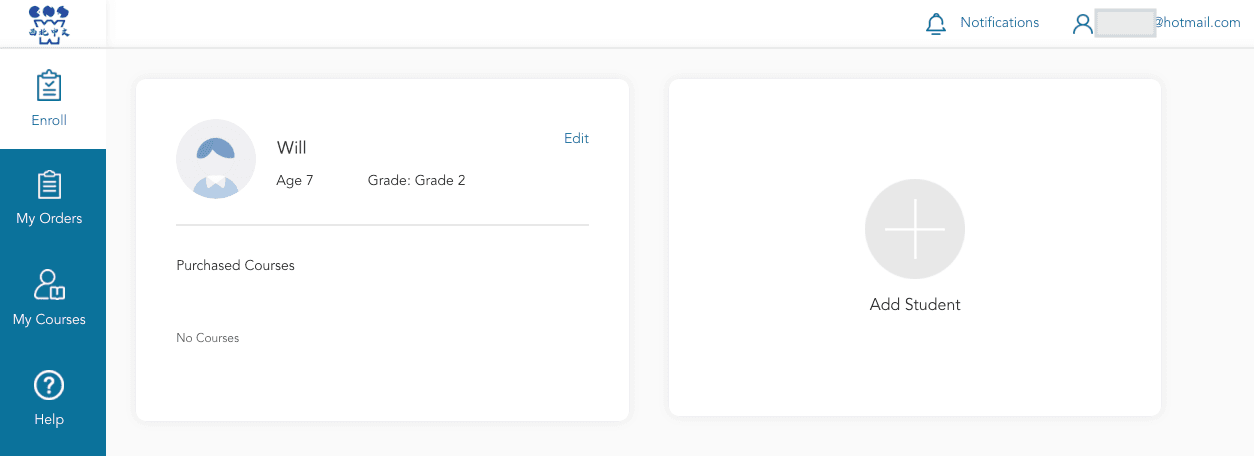
6. Manage Students
After adding the first student, you will enter the Family Portal Dashboard.
Hover over your email address in the top-right corner and click "Manage Students" to add more students.
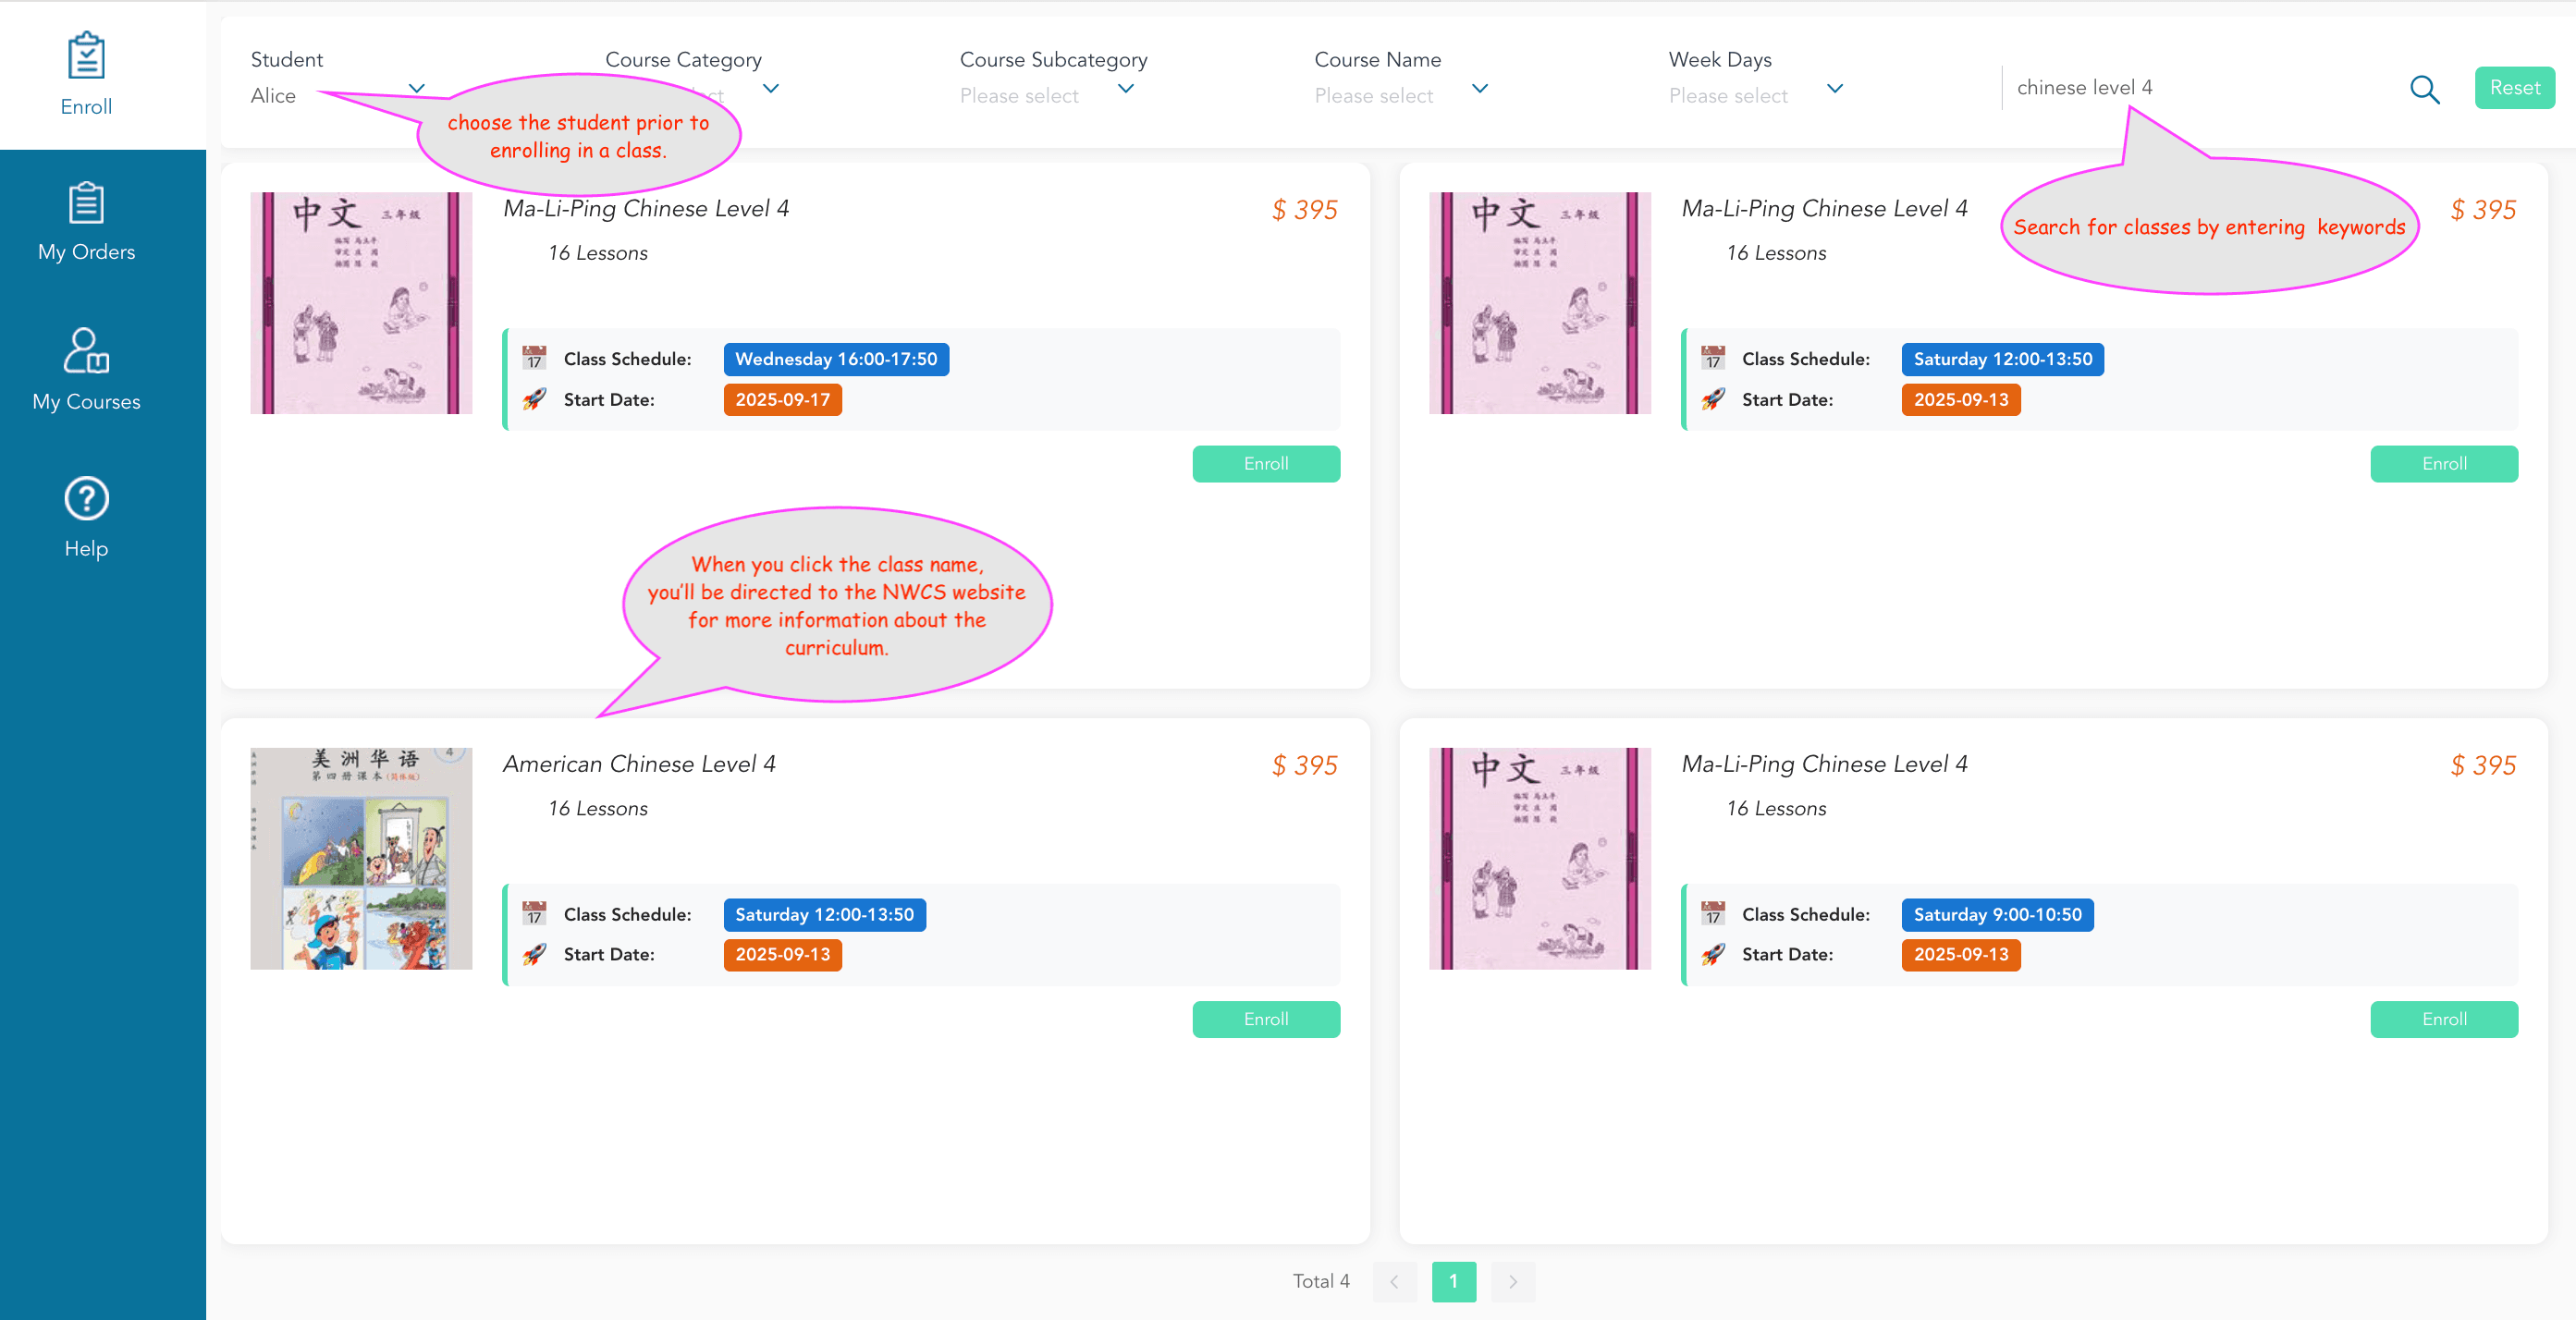
7. Enroll in Classes
Click "Enroll" in the left navigation bar to register for classes.
👉 Be sure to select the correct student before enrolling.
Not sure which course to choose? Visit our course website for detailed information on Chinese, Math, and Enrichment programs.
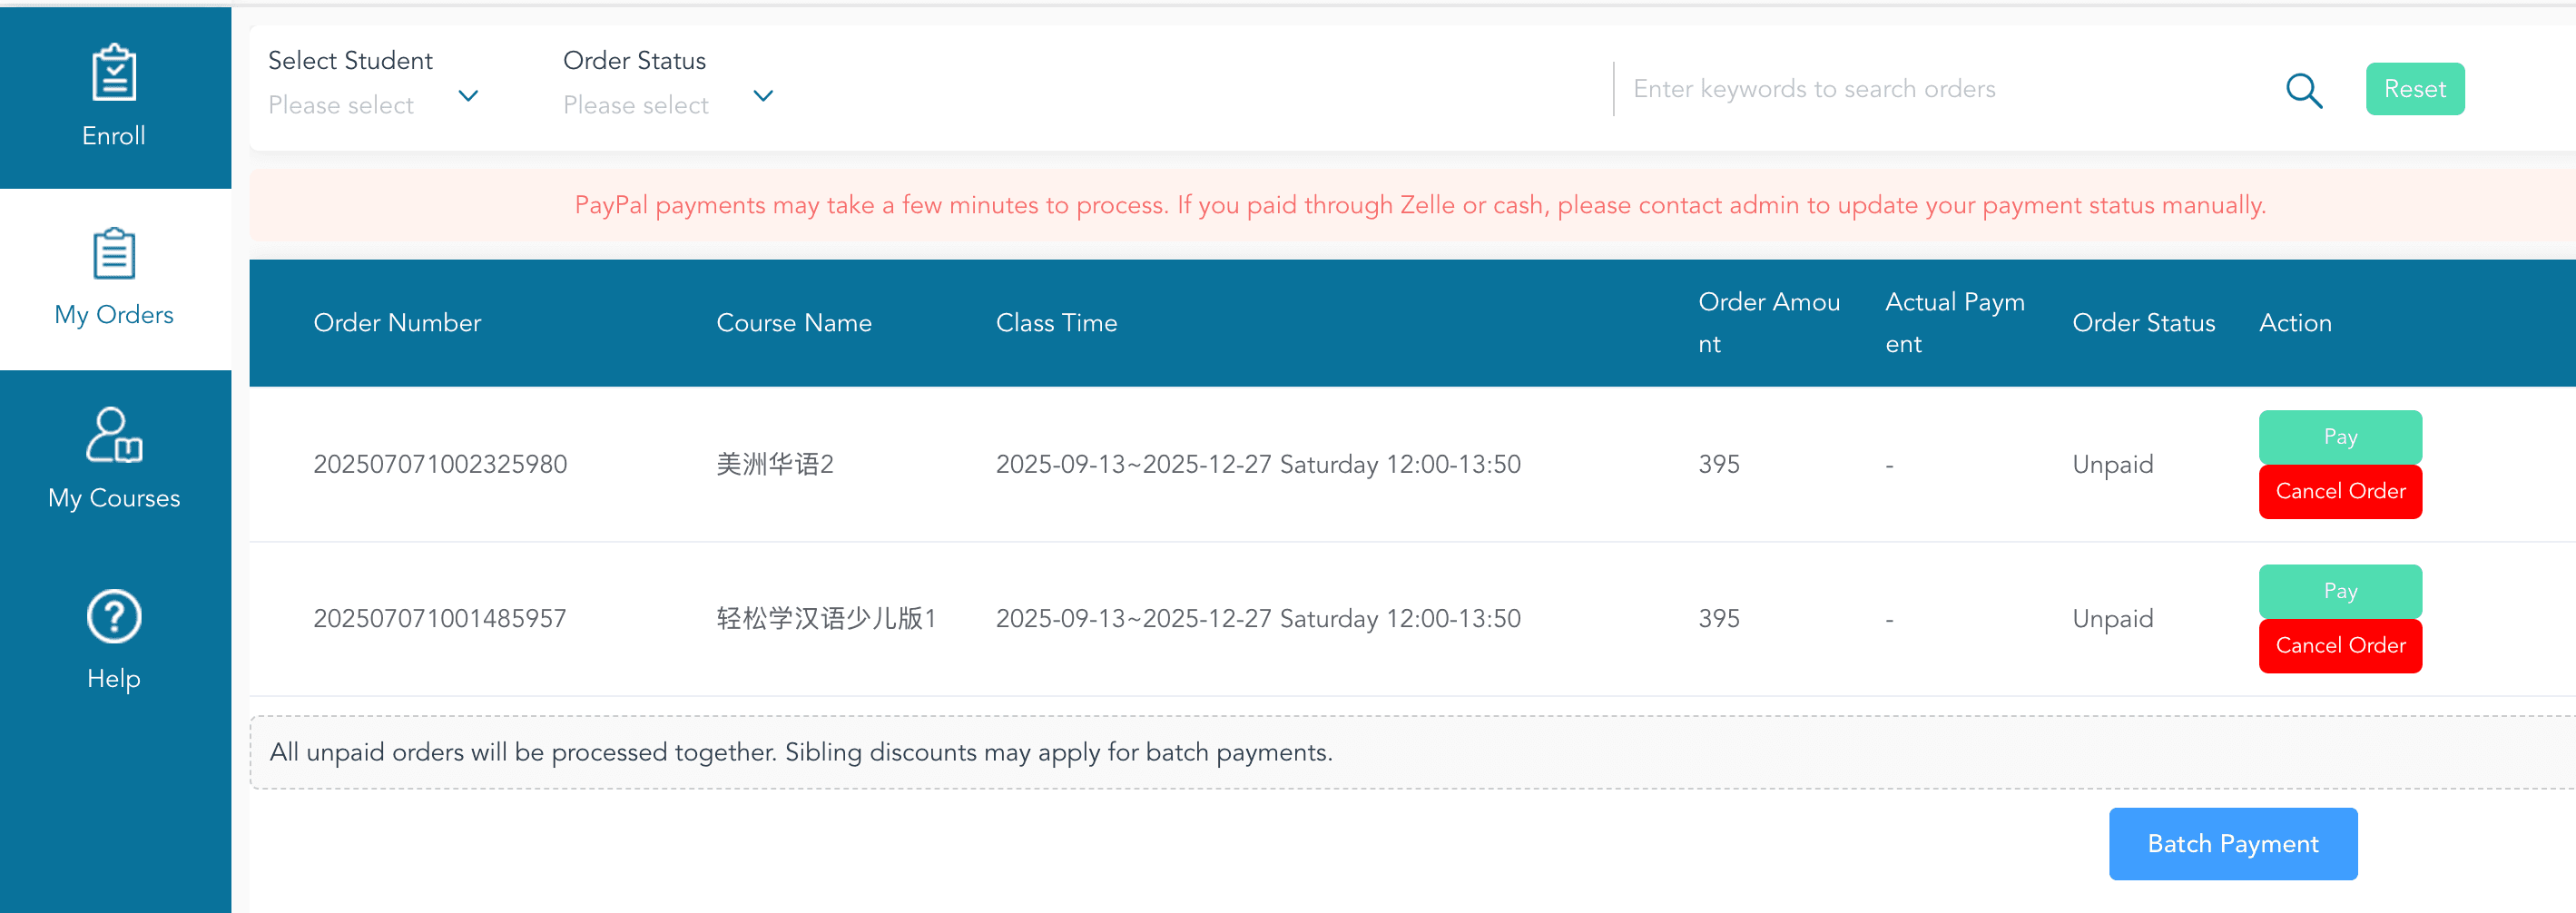
8. View Your Orders
After enrolling, go to "My Order" on the left navigation bar to review all enrolled classes.
**🔔 **Note: All unpaid orders will be grouped for checkout. Sibling discounts may apply when paying in a batch.
9. Complete Payment
Click "Batch Payment" to go to the checkout page. You can pay online via PayPal or Zelle.
💡 If paying by Zelle or cash, please contact the admin to manually update your payment status.
10. View Your Enrolled Courses
Once your payment is complete, you can go to the "My Courses" page to view all the courses your student(s) are enrolled in.